A Referral Will Get You The Best Home Renovation

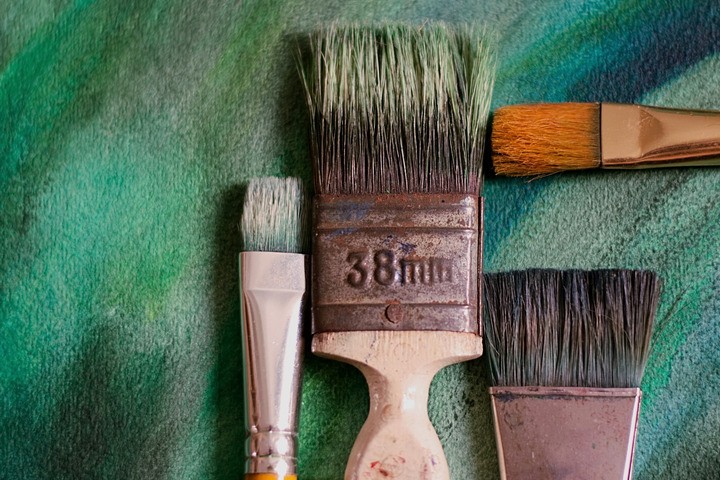
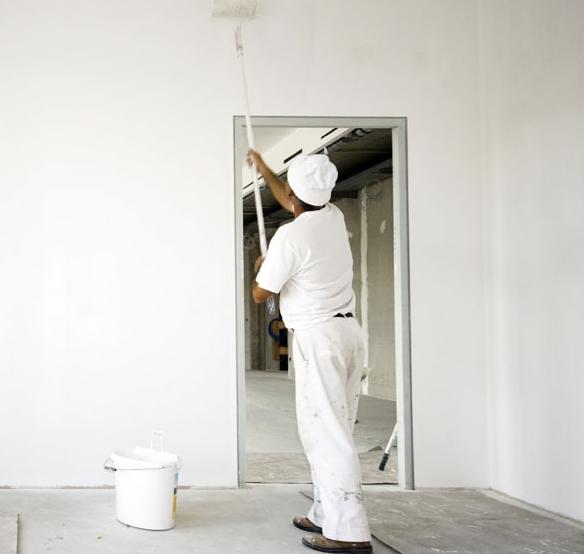
What Are Common Tips for Selecting Wall Finish for a Home Renovation?

One of the most efficient ways to completely change the look of your home is to paint and make changes to the wall finish. Because the colour and sheen of each surface has a major impact on the look and feel of the room, it might be difficult to know how to choose the right products for your project

Use Lighter Colours to Open Your Space

Darker, bold colours can be eye-catching, but painting the all of your walls with a darker hue can cause the room to feel closed in and small, while lighter colours help the room feel larger, more spacious, and open.

Create Accent Walls with Bold Colours

If you are incorporating a bold, dark colour in your design scheme, you can paint a single accent wall that can serve as a focal point. This allows you to add colour without making the room feel claustrophobic.

Choose Flat Finish for Ceilings

Flat paint does not have sheen to it at all and has a matte finish. While it can provide a sophisticated look, it cannot easily be cleaned. If there are stains on flat finish paint, the wall will need to be repainted. This is why this type of finish is often used for ceilings.

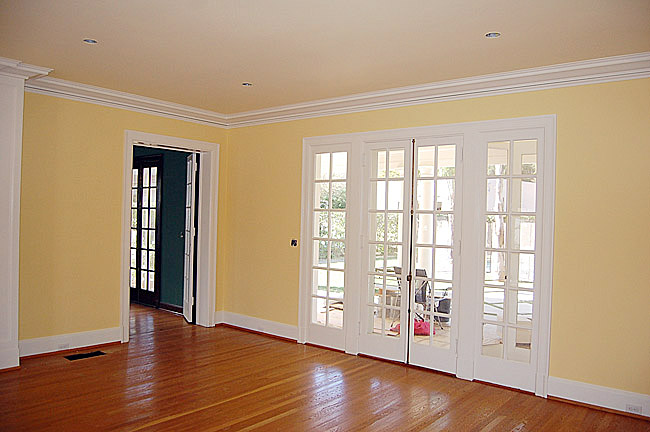
Giving Walls a Satin Finish

The most common finish for interior walls and hallways is satin. This finish provides a small amount of sheen without being extremely shiny. This wall finish also provides a small amount of protection to the walls and minor stains and smudges can be wiped away easily. For slightly less sheen, you can also use eggshell finish, but this finish is more vulnerable to stains.

Should I Buy My Own House Renovation Materials?

Advantages of Buying Your Own Materials

You Have Control Over the Purchases – Regardless of the cost of the materials; you know the exact price, the source, and the product that you are receiving. You do not have to worry about transparency from your contractor because you are doing all of these steps yourself.

Possible Reduced Price – There is no guarantee that your materials costs will be lower if you do the purchasing yourself, but this does give you the opportunity to find deals on materials. While it will limit your choices considerably, you can potentially find bulk discounts and other sale opportunities from suppliers.

Benefits of Having Your Contractor Buy Materials

Knowledge of the Materials and Suppliers – Your contractor purchases these types of materials regularly and knows how to identify quality products and fair prices. You may have an idea of how you want your finished house renovation project to look and function; your contractor will know the trusted names and brands to turn to when it comes to finding the right materials to complete the job.

Deals on Quality Materials – It is arguable that having a contractor purchase your materials can actually reduce your costs. Because contractors have ongoing business relationships with vendors, they can often get deals on materials that are not available to the public.

Having Everything You Need When You Need It – Contractors are not only familiar with the different brands and types of materials, but also the installation processes. This means they know all of the additional items that are needed throughout the process. They can also anticipate potential problems that could arise and buy materials necessary to prevent or rectify these issues

Interior Home Renovations Guide – How to Create a Warm, Inviting Home?

Renovating the inside of your home is extremely important. Not only does it make the home more “livable”, it makes it more inviting. When interior home renovations are done correctly, the value of the home increases significantly. You might also be able to save money with a proper renovation, since many existing features can be replaced or upgraded with energy-efficient technology.

Remodelling for health

More and more people are now making decisions to create a healthier home. Problems such as excess moisture and water intrusion can be fixed during renovation. If you are repainting or refinishing anything, use non-off gassing finishes. Also, have better air filtration systems installed. Old wiring and lighting fixtures should be updated with new, energy-efficient technology. Make sure the attic is well-insulated in order to prevent air leaks.

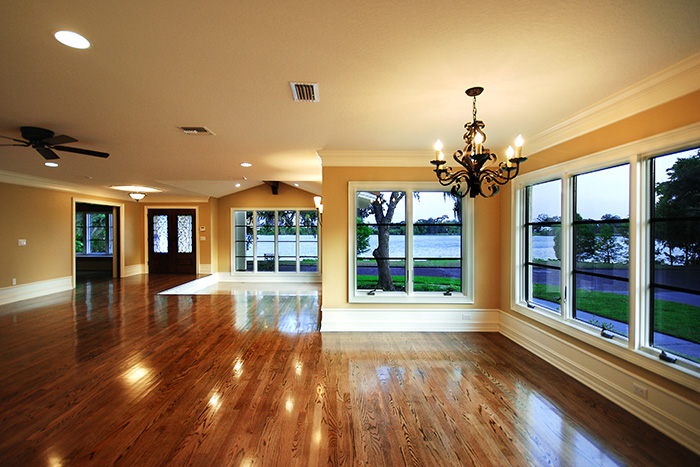
Replacing or restoring old windows

If you live in an older home, you can still retain the historically accurate details of the windows if you have them restored. This is typical with leaded windows, particularly those with stained glass. It’s also possible to restore steel frames that have become partially-corroded, although the process is costly and labour-intensive.

Install well-designed flooring

There are many options for flooring, both solid and carpet. For room to room flow, you can have the same type of flooring throughout the home, or install unique flooring in each individual room. Choices include hardwood, engineered wood, carpet, vinyl, laminate, linoleum, ceramic tile, stone, and even bamboo. If you’re unsure what would look best in each room, have an interior designer help you.

Eliminate clutter

Nothing is more inviting than a clean and organized home. There are many furniture designs to choose from these days, so you can easily find some space-efficient pieces for your home. Don’t go overboard with the decorating, either. In small rooms, just stick with the basics and add a small splash of colour. You can always use mirrors to give the illusion of more space as well.

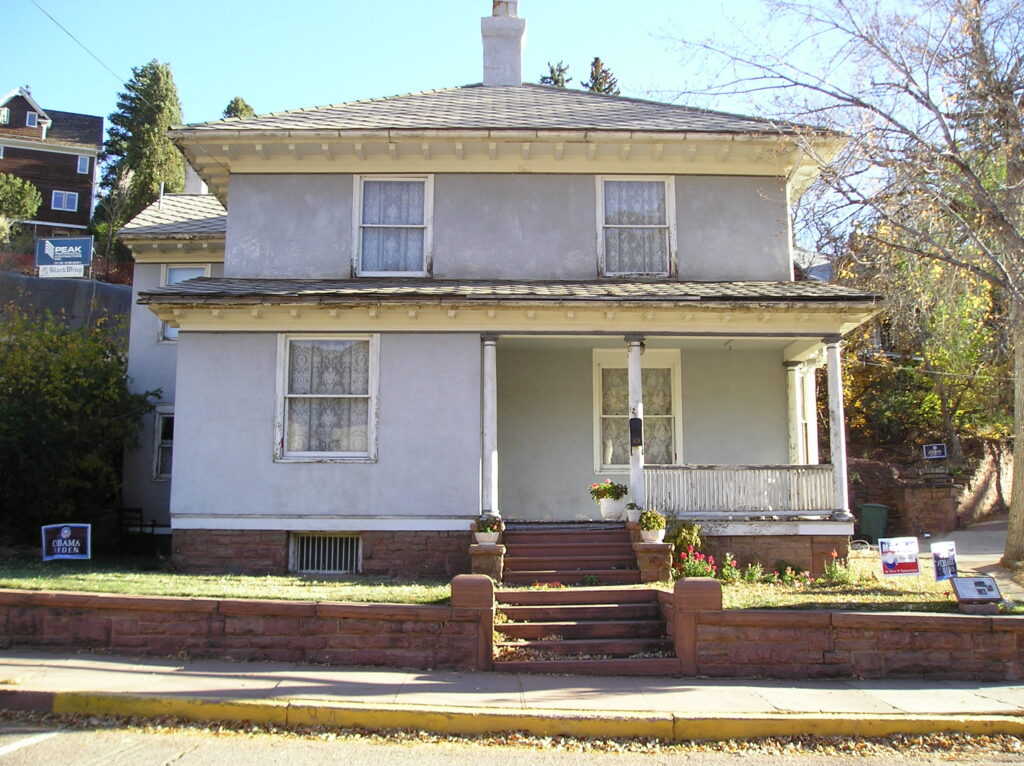
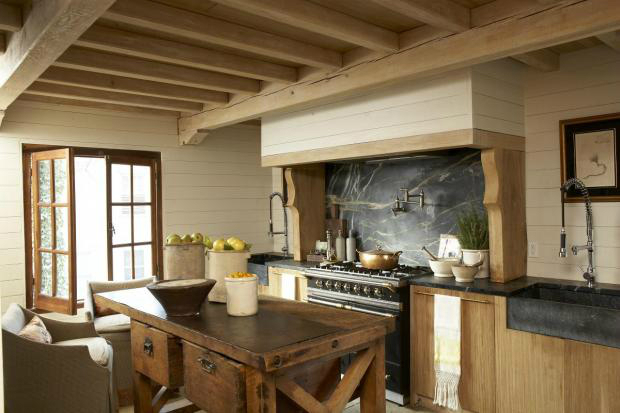
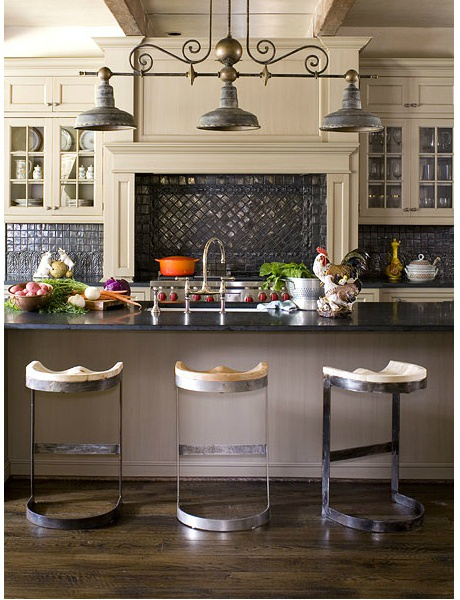
How to update older homes with modern home renovations?

Do you have an older home that is in need of renovation? Whether you live in an old farm house or in a neighborhood with mid-century style homes, you can update many features with modern home renovations. You can still maintain its traditional look with modern upgrades. There might be some pitfalls, so it’s important to work with the right company, develop a plan, and stay the course.

Here are some ways you can transform an old home to a modern home with renovation:

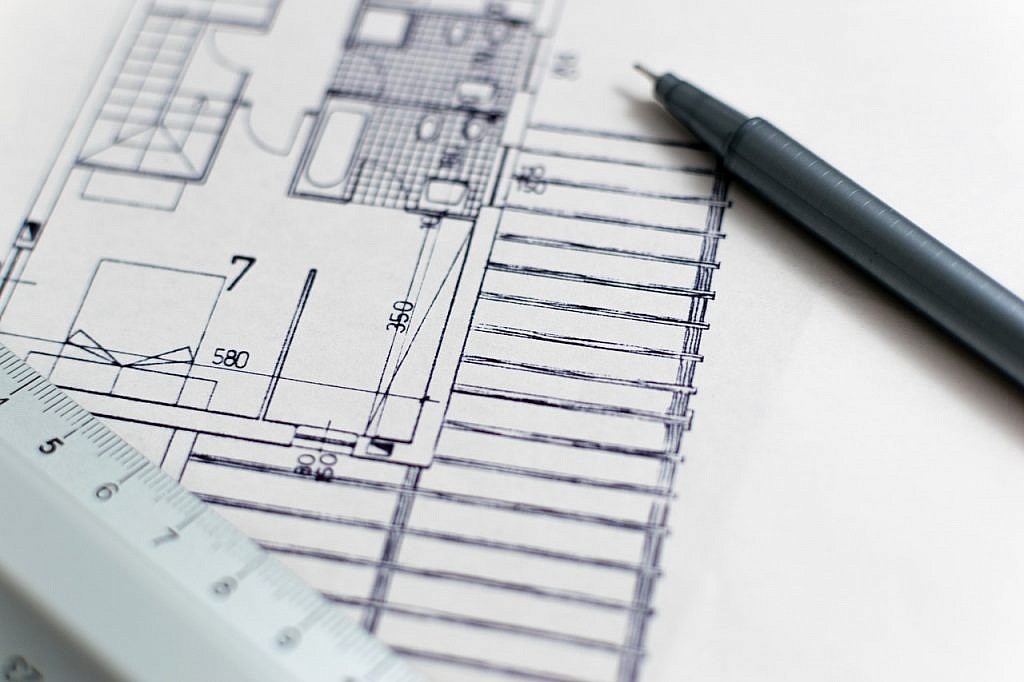
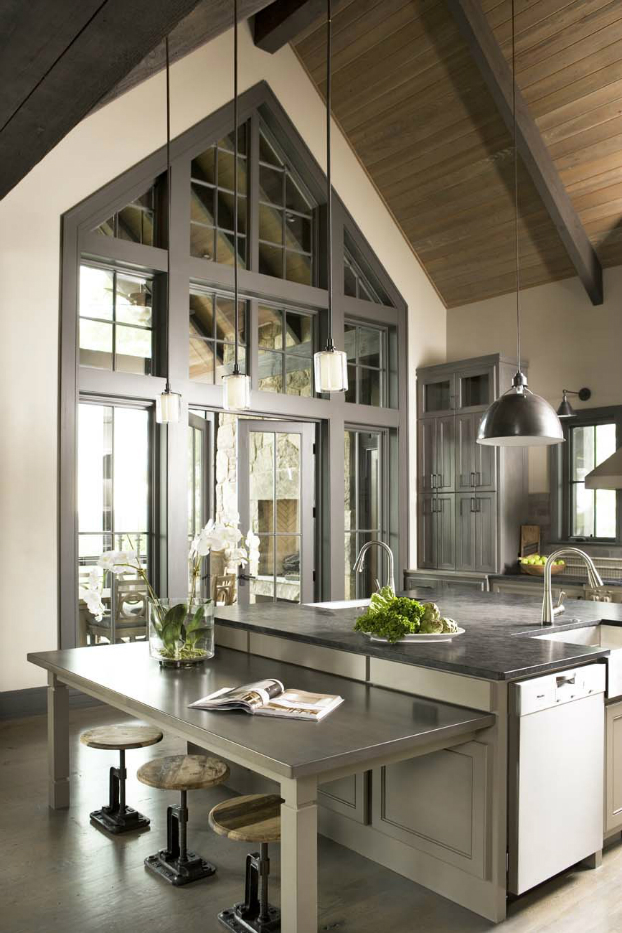
Don’t be afraid to give the kitchen a total overhaul. It’s one of the two rooms you can make the most changes with. Decide whether you want to refinish the cabinetry or replace it entirely. It’s ideal to work with a contractor who is able to establish a to-scale drawing of the existing kitchen and all of its windows, plumbing lines, heating, electrical outlets, etc. From there, determine the changes that should be made and decide on modern design elements.

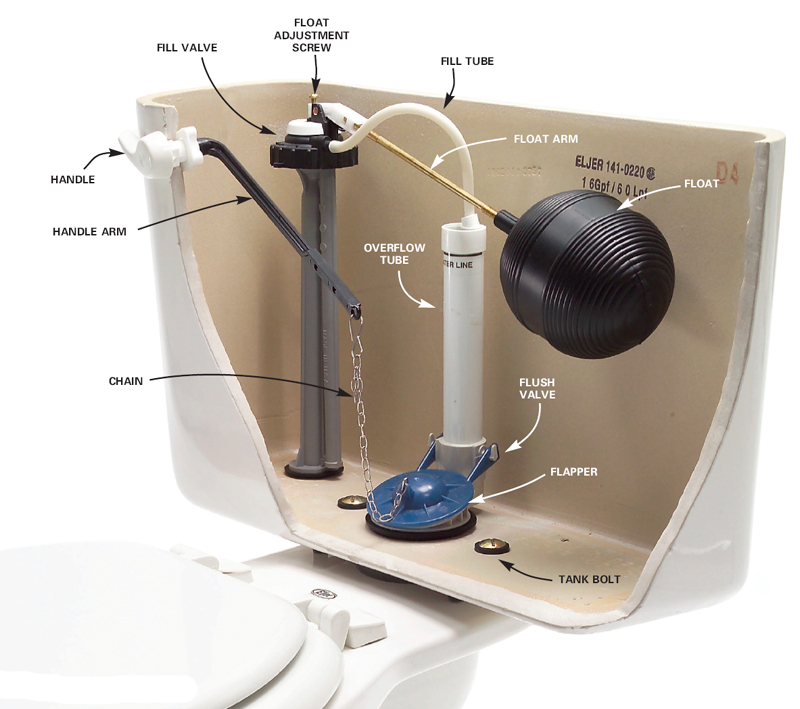
The bathroom is the other room requires most renovation. You might need to update the wiring and add additional outlets to suit all of your modern electrical conveniences. The plumbing might also need updated if you plan on getting a modern toilet with more powerful flushing capabilities. Make sure you have a water heater that is big enough for a multi-head shower or soaker tub.

You might want to keep the wood windows, even if they are decades old. Wood windows are designed to last for a lifetime. Still, not all windows are the same. Consider individual window requirements. For the ones you decide to keep, add weather-stripping to improve energy-efficiency.

A contemporary home is defined by clean lines and angles, which can be visually emphasized by selecting trim and door colours that are a similar hue to the house colour. While a broad range of paint colours work well with modern homes, natural colours are ideal. – especially if you plan on selling the home. If you plan on living in it for a long time to come, you can use any colour(s) you wish.

Consider tearing up the carpet. If it’s an old home, the carpet is probably very old too. It’s probably seen better days. Solid floors are more modern, anyway. If you do want carpet, you can always add a large rug in the hallway, next to the bed, in the living room, etc. It’s best to leave the job of removing carpet to the pros – especially if you’re uncertain what’s underneath the carpet.

The staircases are most likely going to need to be redone. If they still have the original railing, balusters, posts, etc…, have them restored. If they are made of hardwoods or coated with paint that is no longer crisp, they should be stripped. Worn treads can be replaced without too many problems, although the details, such as the nosing returns, should be restored as well. Broken balusters can be replaced and missing ones can be milled. It’s always worth the money to restore or conserve staircases, as they are key elements in any house.

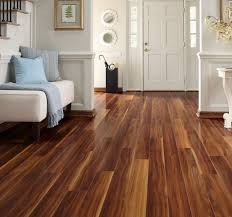
How To Choose Between Flooring Options During Home Renovation?

When you choose to renovate your home, you have the opportunity to transform your space from the ground up. You have to start with the right foundation, and this means choosing between carpeting, hardwood, linoleum, ceramic tile, and other flooring choices

Functionality

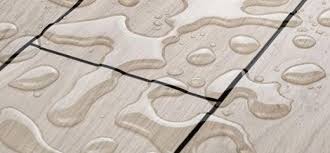
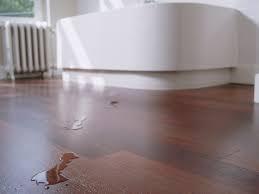
First, you have to choose a flooring option that can perform the way you need it to. Consider the different pressures the floor will need to withstand. If the floor is in a bathroom, kitchen, basement, it will need to be able to handle moisture. If you have pets running around the house, hardwood floors or other flooring materials that are easily scuffed may not be a good idea. Make certain that you choose a flooring system that is durable enough to endure your lifestyle.

Design

Once you have durability covered, you can move on to aesthetic appeal. As the floor takes up so much space, it can have a big visual impact on a room. A polished granite floor can provide a modern look while carpeting obviously softens the space. Consider which flooring option is going to compliment your room design while also keeping you comfortable.

Cost

Flooring can account for a large portion of your overall home renovation budget. Flooring options can also vary significantly in price, as some materials are significantly more costly than others. Laminate and sheet flooring are often the least expensive options, while natural stone and exotic hardwood are among the most expensive.

Maintenance

Do you want a floor that can basically be forgotten about after it is installed, except for maybe a little bit of sweeping or light mopping, or are you willing to put in more effort to keep your flooring looking great? Some flooring systems require more ongoing maintenance than others, and you should be prepared for this before your nice, expensive floor falls into disrepair.

Stopping A Clogged Toilet In Its Tracks

Tips on how to unclog your toilet like a pro

At one point in your life you’re going to face a clogged toilet.  There’s some technique to fixing it, so when you have a clog, don’t freak out, grabbing any plunger so you can jab away like a madman into the toilet bowl.

Stop the toilet bowl from filling up

“Open up the lid and close the flapper.  The flapper releases water from the tank and into the bowl”.   Joe tells us that the flapper valve is the blue cap/shield thing in the image below

Get the right plunger

“People always use the wrong plunger” says Joe.  We found out that the right plunger to use is a flange plunger.  Regular sink plungers don’t work as well.

Warm up the plunger

“Hard plungers don’t work as well either.  Warm up the rubber by putting it under hot water” says.  Apparently, this will soften up the rubber which will help you get a better seal on the toilet.

Plunge!

Stick the plunger into the bowl.  “Make sure you and get a strong seal around the hole.  Then push down and pull up” he says.  He adds that you shouldn’t just focus your strength on the push down.  The pull up is equally as important.  Give a few solid strokes then flush the toilet

Here’s How to Figure Out Why Your Toilet Keeps Clogging

When your toilet keeps clogging, you need to know what’s behind this common issue to prevent it ongoing. If your toilet keeps clogging, likely causes include the fixture itself, your plumbing system, and what you send down the drain. There are certain issues that are correctable on your own, though others require the help of a skilled plumber.

Reasons Why a Toilet Keeps Clogging

Continuous toilet clogs are a problem no area homeowner wants to deal with, time and time again. Some sources of this issue have to do with how you use your toilet. Others concern the fixture or your plumbing system. Learn the common causes why a toilet keeps clogging and how to stop recurring toilet clogs below.

Common causes of a toilet that keeps clogging include:

Too much TP

Flushing things that shouldn’t be flushed

Older toilet models

Toilet trap clogs

Toilet vent blockages

Sewer line clogs

Your Toilet Keeps Clogging Due to Too Much TP!

Toilet tissue is made to be flushed, but when you use too much, your toilet drain cannot handle this much waste! Excessive toilet paper use leads to a situation where the toilet keeps clogging. A small amount of toilet paper easily dissolves in water, but larger amounts do not dissolve quickly enough and become trapped in the toilet drain or sewer line.

That Which Should Not Be Flushed

Toilet paper and bodily waste are the only things that belong down the toilet drain. Non-flushable materials that continually make their way into the drain are one reason your toilet keeps clogging. Because they are not meant to be handled by the toilet, they easily become trapped in the lines to form clogs.

How to unblock a toilet – the quickest and easiest way

Step-by-step guide to unblocking a toilet

How to unblock a toilet – that dreaded phrase you type into a search engine every few months. Sorry you had to find this page. We feel your pain. It might be the dirtiest, smelliest and most unglamorous bathroom job ever, but it’s really easy to do once you know how.

Gather your equipment before going into battle

You will need:

A plunger – ideally ball-shaped

Rubber gloves

Old newspaper to cover the floor around the toilet

Bleach/drain unblocker/caustic soda

An opened window/fan

Don’t be tempted to keep trying the flush

If you try it once and it doesn’t flush properly, it’s blocked and no further flushing is going to help you out. If you know there’s something stuck in your toilet (a child’s toy, a bottle of something that’s fallen in, you know the drill), reach for your gloves and pull it out. Although, if it’s something a bit, well, smellier, then it’s time to flex your plunger muscles.

Locate the blockage

Lift the drain cover to see if the chamber is full of water. If so, the blockage is further along the soil pipe. If the chamber is empty, the blockage is in the soil pipe between the loo and the chamber, or in the pan. You can try and clear any blockages in the pipes by using specialist drain rods or makeshift devices, such as a wire clothes hanger. Failing that, a drain company is the answer.

Use the plunger firmly against the blockage

Use a plunger that is shaped to seal the opening in the toilet bowl to create the correct vaccum and pressure needed, and also to prevent mess. An auger is a flexible rod that reaches far into the toilet controlled by a crank handle. Once the blockage is located, the auger will pull or push the item to remove it. Try the flush again and watch the beautiful sight of a flushed toilet before your very eyes.

Unclogging a Toilet Without a Plunger

Few things are more frustrating than a clogged toilet. Typically, you just plunge a toilet to clear the clog. However, what do you do when there is no plunger nearby? Perhaps you are in a new home and have not yet bought a plunger.

Whatever the case may be, you need to know how to clear a toilet if you do not have access to a plunger. The following are some tried-and-true methods for unclogging a toilet without a plunger.

Use Near-Boiling Water

One way of unclogging a toilet is using extremely hot water that is not quite boiling yet. You do not want to use boiling water because the excessive heat can crack your toilet bowl, which could lead to an even bigger problem.

To unclog a toilet with hot water, simply fill a large bucket with very hot tap water. If your tap water does not get hot, you can heat a pot of water on the stovetop until just before the boiling point. Pour the water into the toilet bowl until the bowl is almost full, and allow the water to sit for as long as possible.

Use Dish Soap

If the hot water method does not work, consider adding dish soap to your toilet bowl. Add about a cup of dish soap and allow the soap to sit for several minutes. Make sure to use a dish soap designed to break down grease.

Ways to Unclog Your Toilet

Nothing says “panic” quite like a clogged toilet. You flush the toilet—the water starts rising and you’re left with mess and an expensive repair bill. In most cases, you can clear a toilet clog with a few tools and a little bit of elbow grease. However, not all toilet clogs are the same. Your toilet could be clogged for many reasons, including:

Using too much toilet paper

Flushing non-flushable toiletries

Dropping toys or other small items in the drain

Plunger

Whenever you hear the word clog, your mind probably goes straight to the plunger. If you’re imagining a plunger with a red rubber cup and a long wooden handle, you’re going to have a tough time breaking up the clog. Cup plungers, also known as sink plungers, are used to clear clogs in sinks and other straight drains. To successfully unclog a toilet drain with minimal effort, you need to use a flange plunger. These plungers have an extra rubber ridge at the bottom of the plunger cup that slides into the toilet drain. This creates a better seal and more suction.

Toilet Snake or Closet Auger

Small, hand-powered drain snakes are relatively affordable and available at most local hardware stores. A toilet snake works by breaking up the clog into smaller pieces, so it can pass through the drain.

Dish Soap and Hot Water

A combination of dish soap and hot water can help lubricate and break down clogs caused by excess toilet paper use. This trick can also come in handy if you don’t have any toilet unclogging tools close by.

Baking Soda and Vinegar

Like the dish soap and hot water method of clearing a toilet clog, a concoction of baking soda and vinegar can make your toilet functional again. If you remember building a model volcano in elementary school, combining baking soda and vinegar creates a fizzy, foamy reaction. Unlike corrosive drain chemicals, baking soda and vinegar are completely safe to use and won’t damage your plumbing. A word of caution: if your toilet is close to overflowing, this method could leave you with a big mess to clean up.

Types Of Residential Roofing

What is residential roofing?

Residential Roofing

Updating your existing roofing will not only add to your home’s curb appeal, but it can also help add to the value of your home. When it’s time to re-roof your home, there are several materials that you have to choose from. It can be easy to get overwhelmed with all of the choices that are available on the market. Each roofing material comes with its own set of advantages and disadvantages when it comes to longevity, affordability, and visual appeal. Ideally, you want to find a material that offers a nice balance of the three.

To help you get started with your research here have highlighted several popular residential roofing choices to help you determine which material is the best fit for your home.

Wood Roofing

For generations, wood shingles were the roofing material of choice for homeowners. Today, many people still fin the look of wood shingle to be appealing. Even as they weather, wood shingles can add a unique element of character to your home.

Homeowners that live in areas that are prone to wildfires may think that wood shingles are out of the questions for them. However, there are many fire-rated wood shingles available on the market. These shingles are treated with a special fire-resistant coating that will protect your home in the event that your roof comes in contact with any embers. Even with these extra safety measures, there are some municipalities that have outlawed wood singles completely. You will want to check your city ordinances to make sure that wood shingles are allowed in your neighborhood.

Wood shingles come in a variety of colors including pine, cedar, and redwood. If maintained properly, you can expect your wood roof to last upwards of twenty-five years.

Asphalt Shingles

This is the most common choice for residential roofing in the area. Asphalt shingles tend to be popular among homeowner and roofing contractors alike because they are easy to install as well as very economical. Asphalt shingles are typically reinforced with an organic material such as cellulose, which does not affect the aesthetic appearance of the material.

Asphalt shingles are available in a variety of colors, which makes it easy for a homeowner to match the material to their exterior paint. If there is any downside to selecting asphalt shingles for your roof, it is that they do not last as long as other, more expensive materials. Additionally, they don’t provide much in the way of insulation, which should be taken into consideration if live in an area that experiences extreme temperatures.

Overall though, Asphalt shingles can work very well for most modern homes. While they may not be as durable as some other materials, you can expect them to last upwards of 20-25 years if you maintain your roof properly.

Synthetic Roofing

Synthetic roofing products, although more common on a commercial roof, are quickly growing in popularity among homeowners. These products may include polymer roofing, rubber, or plastic. They come in a variety of colors and textures to fit your home’s aesthetic. There are even synthetic roofing products that are made to look like natural materials like slate or wood.

The major benefit of choosing a synthetic material for your roof is the durability. Synthetic products are easy to maintain, resist wear, and are typically fire-resistant. The major drawback to a synthetic roof is that it’s difficult to say just how long it will last or how often you will require a roof repair. Because these materials are still so new, we really don’t have a clear understanding of how they will stand up in the longer run. However, that should not be a major deterrent for homeowners as you have the option to choose a roof that will be warrantied for up to fifty years, giving you some peace of mind.

Metal Tiles

Metal roofing materials come from a variety of elements and their compounds – zinc, steel, aluminum, tin, and some other alloys – which makes it a versatile roofing choice. As with all other roofing materials, metal has its benefits and disadvantages.

For starters, it is very durable and resistant to most of the natural threats – rain, snow, fire, mold, mildew, and insect infestation. Metal is also and an excellent heat conductor, which means you will be able to save money on air-conditioning if you choose to install a metal roof. The installation of metal roofing systems is an easy, fast, and inexpensive process.

Their price is one of the reasons people don’t choose metal roofing. Since the material is strong and durable, and the roof will last even up to half a century with proper maintenance, its cost is expected to be bigger. If the material is too pliable (such as aluminum), even the slightest collision will create dents, which will require repairs. Also, the noise rain makes when hitting a metal roof could mean nothing to some people, and to others, it could turn out to be a big nuisance.

Slate and Clay Tiles

Being one of the most durable and long-living residential roofing material there is, tiles are becoming more and more popular among homeowners who wish to protect their houses in the best way possible.

Slate and clay are natural materials, which means they are completely recyclable and offer excellent protection against natural elements and weather. Not only that – they provide the house with a unique rural look that will boost your house’s curb appeal and, consequently, increase its value on the market.

There is a small setback to this seemingly perfect story – their weight, this article argues. Asphalt and metal generally do not require any additional supporting since they are relatively lightweight. Slate and clay, however, can be installed only on houses with a sturdy, powerful structure. Another thing that you should keep in mind is the high price of the material and installation, which will require professional and skillful roofers.

Ceramic roofing tiles

If you are looking for a lot of character in your home, ceramic roof tiles might be the way to go and they are generally durable. Tiles are resistant to fading and are fireproof. Quality tiles should last 50 to 70 years.

In the US, tile roofs are most commonly seen on homes that borrow elements from Spanish architecture. The tiles hang in parallel rows, overlapping to keep out rainwater. Disadvantages to ceramic roofing tiles include their unsuitability for climates with fluctuating weather. Ceramic tiles are prone to erosion under these conditions. While the tiles are durable, they are also fragile. High winds can damage them, as will walking on the tiles.

Find the right roof type for your home based on design, function, and price

Now that you’ve got a feel for the different kinds of roofing available to you, you can start to narrow down your choices. At this stage, you should consult with a professional roofing contractor.

In addition to providing long-lasting residential roofing services, an experienced residential roofing contractor will help you identify which of these five types of roofing are best for you based upon three factors: design, function, and price.

Design

Quality roofing can add resale value to your home and add to its curb appeal. Beautiful terra cotta tile roofing can fit one home’s aesthetic, while the rustic charm of cedar shakes might fit another’s. Or perhaps slate roofing is more of your style. Whatever your tastes, a roofing contractor will be able to walk you through choices that satisfy them.

Function

Roofing, of course, is supposed to protect your home from the sun, rain, and temperature. Good roofing performs, even in high wind areas, with the highest temperature variance like St. Louis. There are framing, underlayment, and installation techniques to help a roofing system perform in even the harshest environmental conditions.

Price

Roofs are typically measured—and priced—in roofing squares, which are about 100 square feet. Metal roofing and asphalt shingles are among the most reasonably priced by roofing squares. You might, however, get a longer run out of a slate or tile roof, which can last for hundreds of years. A roofing contractor will be able to point you toward the right roofing material for your price point.

A Residential Painting Ways To Contract Peace Of Mind

Things to Consider When Choosing a Paintbrush

What to consider when choosing the paintbrush for a painting project? The tiniest detail in a paint job can affect the whole result. Surely, you don’t want to discover a blotchy or paint clumps on the wall. So whether you are a homeowner or a property manager planning to hire painters

Type of Paint and the Brush to Use

There are two types of paint: water-based latex paint and oil-based paint. If you need to use latex paint, consider using synthetic non-absorbent bristles. Latex paint’s water component dries more quickly, so it was suitable for areas like walls and ceilings. Compatible brushes for water-based paint include nylon, polyester, mixed brushes, and or combination of both.

Oil-based paint dries up longer than water-based. It can protect the surface against issues like extreme temperature, and rust, mostly the tear and wear situation. Thinner and turpentine can dissolve the oil-based paint, so use it to readjust your colour. Compatible brushes for oil-based paint are the natural absorbent brush like animal fur or fibres, black and white China bristles from hog’s hair and ox hair.

Brush Type

Brush Size and Width: Depends on the level of delicateness in a paint job, there’s an appropriate size to match it.

Narrow and tight areas like windows need smaller paintbrush within 1”-2” width.

Average sized brushes in 1”-4” is usually useful on kitchen doors, cabinets, and countertops.

Bigger paintbrushes with width 4” are for bigger surface areas like wall, ceiling, and rooftop.

Brush Bristles Shape: Angle Sash is for paint trimming, and some from this shape are used to smoothen finish painting. You can use angle brushes to small, tight spaces like doorways, moulding, and gaps. On the other hand, flat brushes often included in the household collection for cleaning purposes. The most popular flat brush is the flag-tipped wall brush.

Quality Brushes. To know if your paintbrush is in good quality, check out some warning signs. The bristles must hold together through the ferrule, or the metal is binding the hair, and nothing should fall off once you pulled the bristles outward.

Type of Surface

Surface Size

If you think that using the bigger paintbrush to a smaller surface can make your job easier and faster, do not be fooled by it. Professional painters always suggest using smaller brushes than the area you need to paint. Small brushes make it more comfortable to press, glide, and you can control the pressure between your hand and the surface.

Surface Texture

The most commonly found in residential painting job are the matte textured wood, concrete walls, and metals. The glossy surface type includes marbles, glass panels, or plastic doors, and tiles. The significant part of combining creativity and practicality is when you need to cover up the jagged areas – instead of smoothening it, the textured paint will do the trick.

Things to Consider When Choosing Paint Colors

Choosing paint colors for your property is a major decision. While you can always change these colors in the future, frequently altering your home’s appearance isn’t cheap, so you want to get it right from the beginning. The colors you choose for your home or business will ultimately depend on your preference, but few people are so decisive. Careful planning and forethought are required

How Will it Look With Your Current Decor?

Choosing colors is all about context. Your interior painting services may focus solely on painting your walls and ceilings, but these aren’t the only features of a room. Think about the furniture, artwork, and accessories that give the room life and purpose. If you plan on keeping these objects as they are, they can serve as a jumping off point for your color choices. Of course, if you’re going to overhaul the entire space and install new furniture, change the layout, etc., you’ll have to think more holistically about how you want the room to look. In this case, you might start with your paint color instead. The bottom line is, your paint job and decor should complement one another, no matter which comes first.

Don’t Knock Neutrals

When we think about picking paint colors, our minds are trained to turn to bright, saturated hues that make bold statements. However, some subtlety can go a long way. Neutral colors like greys, beiges, and off-whites provide balance to a space and give the eyes a place to rest. If you want your interior painting contractors to incorporate brighter, louder colors, consider including neutral tones as well. In fact, you might begin with a neutral color and then see how other colors interact with it to get the look you want.

Think in Themes

You might be in love with a single color, but most people want some variety in their lives. As such, you’ll probably select a handful of paint colors for your home or business. When doing so, take a broad view, keeping in mind how one color will inform another. In other words, instead of choosing a color, choose a theme or color palette. You might want multiple colors for one room, or you might want each room to have its own look that separates it from the rest. And remember that other aspects of your decor, like your furniture, shades, and bedding, will play into these themes as well.

Light Plays a Role

There would be no color at all without light. It makes sense, then, that different types of lighting affect how we see a single color. We may choose a paint color only to realize it looks different when applied to a surface. This phenomenon must be taken into account when choosing paint colors. Your local interior painters can help you understand the ways in which various finishes and light sources will alter the color’s appearance so you’re not completely kept in the dark.

How to Choose an Interior House Painter

The decision to paint a home’s interior can make a huge difference in the homeowner’s living experience.  From making the home more attractive to increasing the overall resell value of the home, the benefits are almost endless.  This is why it is so important to choose the right interior house painter for the project.  The right painting contractor can perfect the home’s improvement for expert results.

Choosing the right painter for the job can help to alleviate the stress associated with such a massive undertaking.  From choosing the perfect paint color, to choosing the best quality paint, to preparing the home’s surfaces, a professional can lead the project for the desired end results.

For homeowners who have never hired a professional painter before, here are a few steps to make the most educated decision:

Conduct Research. First conduct adequate research to find top house painters in the area.  Research can include internet searches or it can be as simple as asking friends and neighbors for recommendations.  Homeowners should also check the Better Business Bureau website for the contractor’s rating or search for other online reviews from previous customers on sites

Interview Painters & Request Estimates. The next step is to call the painters directly and schedule a walk-through of the home.  During the visit, the homeowner can interview the painter and determine if they will be a good fit for the project.  During the interview the painter should demonstrate their expertise in the painting field.  They should use technical terminology and should express their knowledge of the paints and materials to be used.  They should also articulate what the process will be like when working with them, demonstrating their professionalism and also differentiating themselves from other contractors.

Ask the Right Questions. During the interview the homeowner should ask as many questions as possible to determine whether or not they would like to hire the painter.  One of the top reasons for dissatisfaction among homeowners who did not end up with the results they expected, stems from not asking pertinent questions that would qualify the painter as a good fit for the job.

Local businesses, painting contractors

Are you looking for marketing ideas for your painting company? Like nearly all local businesses, painting contractors often face stiff competition when it comes to marketing.

Promoting a business online is getting difficult. It’s not enough to have a website. You need to have a strong social media presence, set-up effective ad campaigns and have a strong long-term promotional strategy in place.

Focus on local search engine optimisation

The way people search for information online has changed a lot over the past few years. Directories, Yellow Pages and Yelp have been superseded by search engines like Google, Bing and social media networks like Facebook and Twitter. Thus, SEO is not just an additional marketing strategy, it’s a compulsory element of online marketing.

In fact, the most essential part of your online marketing strategy is local SEO. If you are thinking about whether you should invest in SEO for your painting company, it’s time to stop thinking and start doing.

The first thing you need for good SEO is a search engine friendly website that is optimised to generate as many conversions as possible. There are many nitty-gritty aspects of the SEO process that you’re probably not going to have the time or the inclination to fuss around with.

Things to Look for in a Quality House Paint Job

The definition of quality can be somewhat subjective. Yet, there are definite parameters that define whether you received a quality house paint job or not. You should be familiar with these things before you hire a painting contractor.

Proper Protection from Paint

In most cases, a painting contractor isn’t working with an empty house. If you are painting the exterior of your house, protecting shrubbery and landscape plantings from paint is very important. Not only is paint ugly on your bushes, it can also harm the plants. Landscaping is an important aspect of curb appeal so you don’t want to have to reinvest in it after you’ve had your home painted.

Proper Pre-Paint Preparation

A paint job will not last if proper pre-paint preparation techniques are not used. Things like silicone, wax, polish, grease and dirt will prevent the paint from adhering properly. Things might look okay for a short while, but when bad weather arrives, it becomes apparent that pre-paint preparation was sloppy.

Caulking

You have the right to expect a painting contractor to caulk holes, window frames and other trim areas that typically require caulking. One of the goals of painting your home is to protect it from the environment. Caulking prevents water from seeping in behind trim and causing extensive damage.

Clean Lines between Separate Paint Colors

all seen painting jobs where the junction between the ceiling and the walls looks messy because color from the walls slopped up onto the ceiling. No professional should walk away from a paint job where the lines between ceiling and trim, or ceiling and wall aren’t straight and clean.

How To Choose Hardwood Flooring Contractors

Can you make wood floors waterproof?

Hardwood floors do have a weakness: water. We aren’t talking about the type of water that your kids track in or that you spill from a cup. As long as you promptly wipe up this water, your floors should be fine. Small amounts of water dry quickly and do not penetrate the finish.

Unfortunately, hardwood floors can’t handle large amounts of water. If a pipe bursts or water floods in from outside, you must act quickly to save your floors from serious damage such as buckling. Your best course is to call in professionals to quickly dry your floor surface as well as the subfloor to prevent permanent problems.

If your hardwood floors are not completely dried, they become vulnerable to mold, a real health problem. Mold in the home can lead to serious respiratory issues, another reason that wet hardwood needs to have professional drying.

If the floors do not buckle or incur other structural damage, they can be effectively refinished. You must realize that hardwood can take weeks to dry completely, so you should not attempt to refinish them until a professional tells you they are ready for this treatment. Refinishing too soon actually locks in the moisture, causing a myriad of problems.

Waterproof vs. water resistant

Bear in mind that waterproof and water resistant are two different terms. Usually wooden floors which have a finish have some kind of water resistance built in. But, lacquered or varnished flooring is in most cases more water resistant as compared to oil finished floors. Moreover, if you want to make your wood flooring waterproof, you will have your work cut out for you.

It is true to say that there are a few products once can purchase on the market which can protect the flooring from water. But whether or not they will meet your needs in terms of waterproofing depends on what your desired end result is. You may need the floor to be water resistant for instance in a situation that you take a few wet footsteps walking from a bathtub to get a towel and want to feel secure that it won’t cause damage to your flooring. A totally different situation is when you’re planning on waterproofing a wooden floor in an interior that you want to turn into a wet room.

Making your floor water resistant to make it withstand wet feet entering the house from the outdoors or wet feet walking across the bathroom is quite simple and entails the following measures.

How to Waterproof a Wood Floor

There is nothing that makes your home look as neat and cozy as wood flooring. Today, wood is as popular as it used to be before the carpeting craze; its earthy color and warm look give a welcoming impression. However, taking care of the dust and damage is not enough to make a wood floor last. It needs proper maintenance and care, and waterproofing is an important part of the magic formula. Think about how many times you or your kids accidentally spill water or milk or track mud from outside. Without protection, wood will soak it in and, after some time, gain dark spots that damage its appeal. Once upon a time, people used different oils, oil-based products, and waxes to keep their wood floor in good shape, but now, there are more durable, stronger polyurethanes or resins that will make waterproofing that much easier with the right instructions.

Clean the area.

The first step is the most important. The floor needs to be clean of dirt and dust before you apply the waterproofing agent. If there is any grime left on your floors, the sealer will “trap” the gunk indefinitely on the surface.

  • Use a dry mop or vacuum to thoroughly clean the area until the floor is smooth and dust-free. You should also remove all pieces of furniture. You can leave tubs, sinks, and toilets if they are not easily removable.
  • If you are waterproofing wood, you’ll also want to sand the area with a handheld medium-grit sandpaper. Once you restore your wood and clean it free of dust a second time, then you can begin the waterproofing process.
  • You should open all doors and use a portable fan to add ventilation to the room. This will help the floor dry faster and diminish any smells or fumes from the agents.

TIP: Try to waterproof during warm, dry days. High humidity can make the primer and waterproofing agent take longer to dry. This is another reason you need good ventilation in the room.

Apply the primer.

We recommend an epoxy, water-based primer for waterproofing. Pour the primer into a paint roller tray.

  • Using a paint roller or brush, start applying the primer in even strokes. Start in the back corner and work around the walls first. You’ll want to coat about 7 or 8 inches of the wall with primer and waterproof sealer to ensure your bathroom is fully proofed.
  • Then, continue applying the primer to the rest of the bathroom floor. Work in small areas, spreading evenly with the brush.
  • Let primer dry for at least four hours. Be sure to follow the instructions on your primer to make sure it is thoroughly mixed, applied, and dried.

Fill cracks with silicone.

You can start filling in the cracks after the primer has dried. The silicone seals the gap between the floor and wall as well as any other cracks in the floor. This ensures that all areas are waterproof, especially those cracks and gaps that attract moisture.

  • Apply the silicone seal using a caulking gun. This will give you an even, steady application. Use a paint scraper to remove any excess silicone seal.
  • Wait 24 hours for the silicone and primer to thoroughly dry.

Apply masking tape.

  • Use painters’ tape to show the spot to which you’ll waterproof on the walls. The tape will also help maintain an even line of sealer after you remove it.
  • If you are just waterproofing the floors, we recommend proofing half a foot off the floor on the wall. This ensures complete proofing with a reduced risk of structural damage. If you’re waterproofing up to a shower recess, you’ll need to waterproof about 6 feet up the wall.

Apply the first coat of waterproofing.

Pour the waterproofing agent or sealer in a roller tray.

  • Using a paint roller or paintbrush, apply the waterproofing agent to the wall. Start in the back corner and move forward. You’ll apply up to the masking tape.
  • After you’ve completed proofing the walls, start applying the agent to the floors. Move from the back corner outwards, so you end up at the door with the entire room covered. (You don’t want to paint yourself into a corner with the agent.)
  • If you are waterproofing wood (as opposed to waterproofing before laying down flooring), you’ll likely want a urethane waterproof sealer that’s oil or water based. This sealer will protect the natural shine of wood floors.

Pro-Tip: When using urethane sealer, apply the first coat with a wool mop or other thick, natural material. This will help create a smooth application.

Apply the waterproof membrane.

If you are waterproofing a foundation, you’ll want to use a waterproof membrane. This protects the structure from spills and humidity, and it also protects the flooring material from underground moisture. You’ll apply the membrane before laying down the flooring.

  • Cut the membrane with a knife so it is the exact length of the bathroom wall. Lay the membrane so half is on the wall and half on the bathroom floor, covering the crack between the wall and the floor.
  • Paint over the membrane using the waterproofing agent as an adhesive. This basically sandwiches the membrane on to the wall and floor using two layers of sealer.
  • Focus on smoothing the corners and crevices. Then, lay the membrane down on the rest of the floor. Focus on the joints, but cover all areas. Let this first coat of waterproofing and membrane dry for 24 hours.

Apply a second coat.

  • After a day, apply the second coat the way you applied the first in step 5. Do not apply a second layer of membrane.
  • After application, let dry for 24 hours. Be sure to turn on fans and open doors to ventilate further. Don’t forget to remove the painters’ tape.
  • In two days, you will have a waterproofed surface!

Choose waterproof floors

Some flooring materials are naturally more waterproof than others. Below is a list of our favorite water-resistant floors.

Tile: Most ceramic and porcelain tile has a durable glaze that keeps liquids from seeping into the floor. Tile is also easy to clean and maintain, which can help extend the life of your floors. However, moisture can seep into grout and cracks, growing mold, mildew, and bacteria. Thus, it’s important to install a waterproof coat as well.

Vinyl: Vinyl can look like wood or tile, but it’s naturally resistant to water, mold, and mildew. Wood plastic composite is a great wood option to hold up against spills, and it won’t expand with moisture like typical wood does.

Rubber: Rubber floors are becoming more popular, especially for houses with kids and pets. Rubber is naturally resistant to water and provides traction in wet areas. This is especially good for basements that flood often because you can pull up rubber, let it dry, and reinstall it. It’s also resistant to mold and mildew, which makes it a great choice for home gyms.

Small Kitchen Remodeling Ideas To Make Your Space Grand

The Ultimate Kitchen Remodel Guide: Contractors, Storage Space, & More

A kitchen remodel is a big project. You’ll likely encounter unforeseen expenses, last-minute design changes, and plenty of stress during the dusty months of renovation. While the duration of the remodel can be challenging, the finished project is usually well worth the wait. The trick is figuring out how to survive until the end. Luckily, there are a few ways you can ease the challenge of renovations.

How to Have a Successful Kitchen Remodel

The best way to set yourself up for success in your upcoming remodel is to adequately prepare yourself beforehand. Study, shop around, budget, and compare samples before you tear out the first cabinet. Having a well-thought-out plan can save money and your sanity as you go through renovations

Here are some preparation tips to make your kitchen remodel successful.

Make a budget. Before you do anything else, decide how much money you’re willing to spend on your kitchen renovations. Use a free calculating tool to get an estimate of how much your design ideas will cost, and alter your ideas to fit within your budget. Be sure to leave a little extra room in the budget for unexpected expenses.

Find the right contractor. Get quotes from multiple contractors before selecting one. Your contractor should have a good balance of cost and reputation, so do thorough research on potential candidates.

Plan for plenty of storage and lighting. Two of the most common problems in finished kitchens are lack of storage and improper lighting. Plan ahead for these problems by discussing options with your contractor. Talk about under-cabinet lighting and updated fixtures along with clever cabinet structures to squeeze more storage out of your kitchen space

What to Ask Your Contractor Before Starting a Kitchen Remodel

Having a contractor you can put your confidence in is an important part of your kitchen remodel. It’s not only a matter of asking questions, but asking the right questions to determine who is best fit for the job. Here are the top questions you should ask to ensure you’re leaving your expensive project in the hands of an expert.

Can I see your license and certificate of insurance?

Make sure your contractor has completed all the necessary certification require by your city and state. In addition to asking your contractor for proof, you can contact local agencies to ensure he or she is properly licensed.

The Secrets to a Successful Kitchen Remodeling

There are incredibly breathtaking ways to update a kitchen through a kitchen remodel. The upgrading of kitchen cabinets is amongst the vast remodeling procedures that enable you to save an immense amount of money.

Would you like to know how to effectively remodel your kitchen and give it stunning new look? If your answer is yes, then you a€™re in the right place. The good news is: you don’€™t need to hire a professional interior decorator or spend huge sums of money to successfully remodel and renovate your kitchen. So, to help you get started, here are some very valuable tips.

Pick a New Style for Your Kitchen

Start by identifying a new design for your kitchen. Ask yourself if you want a sparsely decorated interior space or a rich, multi-layered design with several colors and accessories. You should begin by putting down clearly written goals for your remodeling efforts. It will be a lot easier to make choices later once you are sure of what you want. Sometimes, your kitchen may only require a new wall color which you may have seen in a photo online.

Focus on Functionality

Always place functionality ahead of fashion. What is in vogue today may lose its appeal tomorrow. So avoid those trendy shapes and colors that will soon become outdated.

Upgrade Your Floor

Upgrade your kitchen flooring with a more modern and attractive material. If you don’€™t have the money to upgrade your linoleum floors with tiles or hardwood, then you should at least change the paint. Also, bear in mind that you should change your floor before you fix new lower cabinets.

Step Kitchen Renovation Timeline

A kitchen renovation is one of the most popular home improvement tasks among homeowners. It’s also one of the most complex – chiefly because there are multiple stages and tradespeople involved. Ensuring that each step of the renovation is perfectly coordinated will help to make it a stress-free process with a satisfying outcome.

To map out a plan, talk to your designer or cabinet-maker and ask them to clearly explain how they work and what will happen once your renovation begins. This will really help, even if you are organising your own tradespeople, such as plumbers and electricians, to ensure all trades are booked in at the correct stages of the process and all necessary items are bought.

Designing your kitchen

The first step, and one of the most exciting in any kitchen renovation project, is the design process. Don’t rush this stage. Take your time to ensure you explore all layout options and material choices with your designer. Spending some extra time now will ensure you don’t have any regrets later, and will also help the rest of the process to run smoothly.

Removing existing cabinets

Once you have placed the order for your new cabinets, the supplier will be able to give you a date for delivery. Prior to receiving them, your existing cabinets will need to be removed – note, this is a good time to get the take-away menus ready while your kitchen is out of action. Alternatively, dust off the barbecue and move out onto the deck if the weather is fine or set up a temporary kitchen space where you can eat inside.

Beginning the building work

If you are opening up a new window or are removing or building some new walls as part of your kitchen renovation, this is the stage when the majority of structural work will take place. It will need to be scheduled so that it is completed prior to the date the new cabinets are due to be delivered and installed. Check with your carpenter or builder how long they think the work will take. As a guide, minor building work will only take a day or two to complete.

THINGS TO CONSIDER BEFORE RENOVATING YOUR KITCHEN

A kitchen is the soul of every home. It’s the room in your house where the whole family gets together quite often and the ideal place to socialize. Its design requires more thought than picking just materials, appliances and colors. The look of the cooking space in your household is an hommage of a person’s taste and all extras come down to your preferences and the style of your home as a whole

MAKE UP YOUR MIND ON WHAT YOU WANT TO ACHIEVE

The whole process of kitchen renovation is more than just aesthetics. Focus on what you want to achieve with the process, whether it’s a better utilization of space, adding extra functionalities or integrating your kitchen with other areas of your home. This will help you rationalize the renovation project and assure everyone in the household involved is on the same page from the very beginning.

SET A REASONABLE BUDGET

It’s very important to set a reasonable budget for the process of remodeling, having in mind the actual value of your property. There is no purpose in investing $15,000 in a superior kitchen if your property is worth $150,000 – you just won’t get your money back. On the other hand, if your property is worth $500,000 and you remodel on a low budget you could end up devaluing your home which is not good either.

DECIDE HOW YOU ARE GOING TO EXECUTE THE PLAN

The most cost-effective approach to kitchen remodeling is doing it yourself, but it doesn’t come without a risk. Be realistic when you think of how much you can do yourself and what will require a skilled professional such as a kitchen designer or a contractor. If you go for a total do-over, you might need to carry the plumbing, electrical and gas fittings too. It’s for the best not to attempt to do these things on your own and hire a reliable professional instead.

DETERMINE THE COLORS SCHEME

If you remodel the kitchen simply because you need a change of scenery, rather than to sell it, you have the room to be creative with everything, even the colors. Follow your heart and just choose a kitchen style. Whether it’s the Italian-style rustic kitchen or minimalistic modern look cooking space you long for, the style you want will dictate the color scheme.

What to Ask Your Contractor Before Starting a Kitchen Renovation

The kitchen contractor you choose determines the success of your kitchen renovation

Like any other home renovation project, when you’re embarking on a kitchen remodel, whether major or minor, don’t skip on the planning. A project that impacts the heart of your home requires careful thought.

Before you hire a kitchen remodeling contractor, ask these questions

know you’re eager to rip out those ugly, dark brown cabinets and 1980’s lighting. But before you begin your remodel, here are some important questions to ask your contractor so there are no illusions and you know what to expect.

Do You Have References?

When you’re putting out thousands of dollars, it’s not unreasonable to want to know what you’ll be getting. A reputable contractor should be able to provide you with names and numbers of past clients. Don’t be bashful about contacting the people on that list and asking them for feedback.

How Long Have You Been in Business?

Contractors who’ve been in business for many years are likely to have worked out the kinks of their trade, and know what problems are most likely to arise and how to handle them quickly and efficiently.

How is Payment Handled?

You should never pay for the entire project before any work is done. While it’s not uncommon to be asked to pay a minimal portion up front, look for a set schedule that outlines payments as certain milestones for the work are completed.

Important Tips For Long Distance Moving

Packing For a Long Distance Move

When you’re moving long distance you have to worry about more than just packing up your house. You’ve also got to pack for the trip. If it sounds like something that’s looming on the horizon, this article is for you. It’s all about what to consider when you’re packing up and heading down the trail a ways.

Plan Out Your Moving Day Box First

There are certain things that you’ll need in transit and on the first day once you reach your new home. This is what goes in your moving day box.

Pack like you would for a short vacation. Include:

●      A few changes of clothing

●      Toiletries

●      Medications

●      Towel

●      Glasses, dentures, etc.

Set all of these essential items aside and save them until the very end of packing. Have each family member pack up a small suitcase or duffel bag with the items above.

Decide What Will Get Packed in Your Vehicle

While the professional movers can handle the truck, you can use your personal vehicle for additional storage. It’s a good idea to pack as many valuable and irreplaceable items in your car as possible. That way you’ll be able to keep an eye on things every step of the way.

Get Serious About Downsizing . . . Even the Big Items

Downsizing should be a part of every move since it saves money. But when you’re moving across country it’s about more than going through your closet and kitchen cabinets.

Items You Should Leave Behind When Moving Long Distance

Are you gearing up for a long distance move? If so, read on to learn about the items you should leave behind when moving long distance.

Moving is tough work. Especially if you’re moving long distance. You’ve got possessions to pack, new living arrangements to make, and, most importantly, you’ve got to figure out how to get there. Leaving a few things behind can often make the moving process a whole lot easier.

What to Leave Behind When Moving Long Distance

Before you decide what you’ll keep and what you’ll leave behind, it’s important to asses your situation. For a long distance move, it’s especially important to try and pare down your possessions to the bare minimum. Shipping costs, especially when crossing international borders, can add up quickly. So, if you don’t need it or can easily replace it, it’s best to leave it behind.

Clothing

One item that many of us could stand to reduce is clothing. Many of us tend to buy clothes at a pretty consistent rate, picking up new styles when they’re released or good deals when we can find them.

Old Paper Items

Another thing that people tend to accumulate is old paper items. Whether it’s old bank statements or documents that were once important and needed to be kept, it’s easy to let paper accumulate.

Bathroom Clutter

Clutter tends to build up quickly in the bathroom, but it doesn’t seem to go away easily. From cosmetic products to small items like combs and brushes, it’s easy to quickly fill drawers and cabinets with small items.

Residential Movers

Whether your move is near or far, tailored residential moving services to reduce your burden. chip away at moving-related chaos, replacing it with a care-centered approach. From the moment first speak, until you are happily settled in your new home, create an unparalleled, efficient moving experience that alleviates your stress, and brings you peace of mind.

Residential Moving Services Include:

Obtain boxes

Pack possessions

Label fragile objects

Write room locations on packages

Organizing Services

Concierge Services

Box Rental Service

Help You Pack

Moving offers a full range of packing options. pride ourselves on effective communication at every stage of moving, and will guide you to packing perfection!

Responsive and Flexible Onsite Moving

You may have an onsite move that does not require a moving truck. However, you may still need items packed, loaded, unloaded and stored. For instance, during a remodel, or a home-staging, you may need to move furniture within your house.

Long Distance Moves

Moving out of state or moving across country is always a daunting task. But with Movers in your corner, you can relax, at least a little bit. long distance moving experience is second to none and we’ll make sure everything goes as smoothly as possible when the big day comes. Most people don’t move long distances that often, so when it’s time to take the plunge, it’s best to hire a professional team to make sure everything goes as planned.

Organizing Tips

Eliminate unnecessary files and transfer hard copy files to a digital medium if possible. Consider donating unwanted office furniture and supplies to charity.

File a change of address form at the post office to have your mail forwarded to your new location and notify clients that your office is moving.

Have all employees remove their items from the refrigerator.

Create a folder for all moving related records and documents for easy access to payment records and other information you may need.

Verify freight elevator hours and inquire about special documentation for professional movers with building management.

Packing Tips

Label boxes “Fragile” or “This Side Up” according to its contents. All fragile items should be wrapped in bubble wrap and packaged with Styrofoam peanuts.

Dedicate a box to essential work supplies or materials that you will need to access on the first day.

Be aware that old boxes are not always strong enough to hold heavy items.

Wrap items in bubble wrap and packing paper. (Note: Newspaper may leave black ink residue on items.)

Label boxes clearly with the future rooms and offices where the boxes will be unpacked.

Pack heavy items in small boxes and lighter items in larger boxes, if possible.

Moving Checklist

4 Weeks Before Moving Day

Go through every room of your house and decide what you’d like to keep and what you can get rid of. Think about whether any items will require special packing or extra insurance coverage

Use binder to keep track of everything—all your estimates, your receipts, and an inventory of all the items you’re moving.

Order boxes and other moving supplies such as tape, Bubble Wrap, and permanent markers. Don’t forget to order specialty containers, such as dish barrels or wardrobe boxes.

Start using up things that you don’t want to move, like frozen or perishable foods and cleaning supplies.

Check room dimensions at your new home, if possible, and make sure larger pieces of furniture will fit through the door.

Donate unwanted clothing or household goods to charitable organizations. Obtain receipts showing the items’ approximate value for possible tax deductions..

2 Weeks Before Moving Day

Start packing the things that you use most infrequently, such as the waffle iron and croquet set. While packing, note items of special value that might require additional insurance from your moving company. Make sure to declare, in writing, any items valued over $100 per pound, such as a computer.

Clearly label and number each box with its contents and the room it’s destined for. This will help you to keep an inventory of your belongings. Pack and label “essentials” boxes of items you’ll need right away.

Add items such as jewelry and important files to a safe box that you’ll personally transport to your new home.

Go to your local post office and fill out a change-of-address form, or do it online at usps.gov. But in case there are stragglers, it’s always wise to ask a close neighbor to look out for mail after you’ve moved. Check in with him or her two weeks after the move, and again two weeks after that.

Alert the following of your move: banks, brokerage firms, your employer’s human resources department, magazine and newspapers you subscribe to, and credit card, insurance, and utility companies

Arrange for medical records to be sent to any new health-care providers or obtain copies.

Have a “garage sale” or use an online auction service to dispose of unwanted items

Affordable, Approachable Moving Company

The affordability, accountability, honesty, and professionalism guys display gives us what believe to be the best moving experience any person could ask for. give that extra 1% that other moving companies don’t, and that in itself earns major kudos from those move. Not only do think are the best, set out to prove it on every move and customers can attest to this

In this day and age fancy ourselves to be up to speed with this ever-changing world and moving should be no different. With that being said, before your move date will send out a complimentary confirmation email just ensure there are no last minute changes. If you don’t respond to that understand since also make confirmation calls to those have not heard from 48 hours prior to their move date.

moving companies don’t, and that in itself earns major kudos from those move. Not only do think are the best, set out to prove it on every move and customers can attest to this. Legends are forever, so you can be sure are not going anywhere.

How Not To Choose A Wedding Photographer

How can I promote my wedding photography?

While we have explored this topic of attracting your ideal photography clients at depth, the basic things you want to keep in mind are what defining attributes will your clients have? A simple example for us is that we enjoy working with people who are laid back, casual but cool, artistic themselves, open to a little adventure, enjoy nerdy things like Star Wars and Game of Thrones, and enjoy music similar to ourselves like Bright Eyes. Obviously, not every person we work with meet all of these criteria, and that isn’t strictly the goal – but having at least some of these things in common will make our photography sessions and wedding photography a lot easier, because we can jive with our clients on a personal level. After all, the best photographs come from being able to form a connection with the people you work with, and as long as you have the technical picture-taking skills to go along with it – photography is a fairly easy thing!

We feel that we have a valuable voice in the world of marketing photography services because we have seen great success in our first year of booking clients, and have learned much in the process as well.

1. Attract your ideal clients, and make them happy!

If you currently have some couples already booked, the most important thing you can do to help your photography business thrive is to make them happy. For us, a mandatory part of this process is finding ways to make getting their photos taken enjoyable and authentic to their life experience. It makes following up and helping to assure them that their wedding day will run smoothly – even if we get off time. While every client should be treated this way, it is especially important to focus some of this energy on those clients who epitomize your ideal client.

Why is this so important? Highly satisfied clients will talk to their family + friends, and recommend you – driving more business. What often happens as well is an “ideal client” will have a family + friend’s circle often with similar characteristics. This is true for just about everyone, as we tend to stick closest to people who are similar to us. So, when shooting a wedding for your ideal clients, keep in mind that the bridesmaids and groomsmen (in particular) are probably pretty similar in personality to the bride + groom, and might be getting married sometime in the future themselves!

2. Make connections with other vendors in your area.

Other wedding vendors can help enable your photography business. Every time we shoot a wedding, we make an effort to talk with the DJ/band, food vendors, venue management, etc. We are happy to recommend these people when they do well, and in many cases they offer the same to us. Do not limit yourself just to other non-photography vendors, as building relationships with other photographers is also valuable. We learn much from other photographers, collaborate on occasion on styled shoots, and even exchange client referrals when we have dates booked. We have booked several weddings like this, no small feat.

3. Business cards and album samples.

There is something unique about offering something tangible to someone you meet to help solidify your brand in their mind. If you are noticing a trend of in person, face-to-face interactions in these first couple of wedding photography business marketing strategies, you are noticing something critically important to success in this industry. Learning how to socialize and promote yourself to prospective clients, current clients, and the people you will work with (both directly and indirectly) is key. Leaving business cards with all of these people is critical in providing a physical representation of your business with them. Some even go as far as to leave album samples with venue management to show to people who book their venue, and who are looking for photographer recommendations.

Offline promotion

This can make a huge difference for your business and it’s easy to implement. Print a stack of business cards with your details right before a wedding. Include on those business cards a direct URL to the gallery where you’ll be uploading all the photographs from the event. Share those business cards with the guest and let them know that they can view the photos on that link in a couple of weeks/months.

Now, guests can easily find all the photos, order prints, albums or holiday cards from you directly + they have your details in case their own event is approaching.

Even better, add an email sign up to view the photos, and you can market directly to those individuals, especially great around anniversaries and birthdays.

Online promotion

Tools like Pic-Time offer you an easy & beautiful way to up-sell to your clients, their family & friends. It can be anything from holiday cards, large prints, albums, etc, all with a sweet promo code for extra motivation.

Create a Client Guide

A Client Guide can not only save you time on answering the same frequently asked questions over and over again via emails and social media – but can also help you attract new, qualified leads with potential to be converted into clients. All you have to do is create a pdf guide with useful information, tips, vendor recommendations, planning insights (it all depends on your target client and what’s important for them in relation to your photography service). Then offer that pdf for free on your website in exchange for a user’s email.

This allows you to grow your mailing list

You know there are potential clients for your type of photography service, all you need to do is nurture those leads into happy & excited clients, through a series of relevant [automated or manual] emails.

SEO

Most likely you’re already doing at least some basic SEO for your website. You’re probably choosing keywords more accurately for various sections on your homepage and website, you’re using the Yoast SEO plugin (if your website is with Flothemes or just WordPress). SEO is a long term, continuous process. It’s not this thing you do once and then forget about it for the next 10 years.

If you want to increase your chances of being found by clients on Google (and other search engines), there’s a whole list of steps you need to take & implement on your site. We’re describing most of them in this article on Everything a Photographer Needs to know about SEO. You can also join groups like Fuel your photos, The SEO for photographers group and FloSEO to find out about new trends and changes to Google’s Algorithms, get tips, recommendations and help from SEO experts within the photography industry. Don’t get overwhelmed. It’s one solid step at a time.

If you’d like to dive a bit deeper into this topic – there are a few important things you need to take care of to be sure that your site meets minimum requirements for SEO. Here are some of the optimizations you might want to address, to get better results in organic searches:

  • Make sure your website is secure with an SSL certificate – this is an important ranking factor and is good for your customers’ experience
  • Make sure your site looks good and works well on all devices – this is an easy task with Flothemes, as all our templates are fully responsive and look great on different screen resolutions.
  • Improve your site speed – it’s essential for your UX and conversion rate, especially on mobile devices. If your site takes too long to load, nobody’s going to wait. They’ll exist your site – potential client lost. Learn here how to speed up your website by yourself.
  • Make sure your site is crawl-able by search engines – Google and other search engines still heavily rely on textual content and keywords. Your text and images should be visible and descriptive. Also, make sure you don’t hide relevant content on mobile devices, as this isn’t good for mobile first indexing.
  • Avoid duplicate content – it’s bad for your SEO and dilutes the quality of your website. Identify pages that look similar and make sure you redirect them or point them to your main ones.
  • Take care of your on page SEO – structure your pages well and include relevant textual content, headings, internal/external links, images with alt tags, SEO friendly URLs and structured data.
  • Build more backlinks – the more high quality websites link to your site, the higher are chances to rank on the 1st page in Google. Don’t forget that quality beats quantity.

Portfolio Website

The most important online presence that you need to create for yourself is your personal website. This site should showcase a portfolio of your best photography work – normally targeted towards weddings and couple’s portraits.

More than that, though, your website should be designed around your brand vision. Honestly – this may be one of the more challenging aspects of starting a wedding photography business. With a rock solid brand, more people will be attracted to working with you.

Some aspects of your brand that should be reflected on your website will include a good About page (should talk about who you are, how you work, what you offer that is different – and include a personal touch to help people connect with you more), brand specific imagery (think: logo and other graphics), and so on.

Have clients recruit their friends

Offering a free gift or a small discount to people who find two or three friends to all schedule photo sessions on the same day can be a huge motivator for people to find others to hire you as well. Again, we’re harnessing the power of word of mouth advertising, but it’s so powerful that it can’t be ignored.

Get featured on photo blogs

There’s a ton of wedding and portrait blogs out there that feature photography, and there are some portrait blogs that feature portrait photographers as well. Get featured if you can, then promote it where your clients can see it. There’s nothing wrong with reminding them how awesome you are. It’s simply good business.

What Are The Duties Of A Family Law Attorney

Why would you need a family lawyer?

There are a variety of problems that arise within a marriage, civil union, or domestic partnership that can be handled by a family law attorney. There is no law in the United States that says that people appearing in a court case need to be represented by a lawyer. People involved in a court case are legally allowed to represent themselves if they so wish. Representing oneself in a family law case can be difficult though. There are so many aspects of family law that a family law case could possibly encounter. The help of a family law attorney might be the best bet when appearing in court for a family law case.

The aspects of family law that could be challenging are:

  • Divorce
  • Spousal support
  • Child support
  • Visitation rights
  • Annulment
  • Property settlements
  • Alimony payments
  • Parental responsibility orders
  • Legitimacy
  • Spousal abuse

If you have may need legal assistance regarding a Family related matter, consult with a Family Lawyer in your area for a free case review to explore your legal options.

Why Hire a Family Lawyer

It is always a safe bet to consult and hire a family law attorney when dealing with one or more of the above mentioned problems that can arise within a marriage, within a civil union, or within a domestic partnership. Family law is a wide topic of law that covers everything mentioned above and then some. A family law attorney will be able to answer any questions that might arise with a family law problem while also making the court process much easier on the plaintiff or the defendant involved in a family law lawsuit.

If a couple has decided, after a period of separation that they wish to end their marriage and obtain a divorce, should consult a family law attorney. The laws and rules regarding filing for a divorce can change each year and a family law attorney will be able to define all of those laws and explain all of the changes to a couple that is getting divorced. A divorce lawyer will also be able to work hand in hand with the other spouse’s lawyer during the divorce process.

A married couple does not always have problems that lead to divorce. Other problems that can arise are domestic violence such as spousal abuse or child abuse. Spousal abuse or child abuse can be the result of emotional abuse or physical abuse. A family law attorney will be able to help settle the differences between two spouses involved in these types of cases that could possibly lead to a divorce. If a divorce does occur, the spouse that was abused will more than likely seek spousal support, restitution, compensation for damages or medical bills and child support if they are awarded child custody.

What Should I Expect When Working with a Family Lawyer?

Because the family law practice area is so broad, it’s hard to say exactly what you can expect from a family law proceeding. But in the end, you should have a better defined relationship with your family. In any case, your lawyer should supply you with advice on whether you should take your case to court and how strong your case is. Your lawyer should take you through every step of the process of filing papers or a lawsuit. For document creation or review, you can expect that your family lawyer will create a legally binding agreement that has clear terms you can understand. If you have to go through negotiations or go to court, there is no guarantee that the outcomes will be ideal for you, but having a family lawyer on your side will give you the best information and chance of winning your case.

Here are a few reasons why choosing a qualified family law attorney is the right decision:

  • Objective advice – Even if you’re the party who is initiating the divorce action, chances are that you are experiencing some very deep emotional turmoil concerning the matter. When emotions are running high, it’s easy to make rash decisions that, in hindsight, will prove to be ill-considered. Having a family law attorney in your corner means that you have a professional who can offer objective, fact- and experience-based advice regarding your divorce. A family law attorney can help you avoid going for a quick resolution that leaves you at a long-term financial or parenting disadvantage.
  • Access to top-notch consultants – In contentious divorce proceedings, the testimony and advice of professionals such as bankers, investment consultants, appraisers, physicians, and mental health experts may be necessary. Experienced family law attorneys have contacts with many of these experienced professionals and can recruit knowledgeable experts who can lend authority to your case with their knowledge.
  • Courtroom experience – There is no substitute for experience when it comes to litigation. Family law attorneys have spent a significant portion of their careers in the courtroom arguing divorce cases. This experience gives them unparalleled insight into what tactics opposing attorneys will pursue and how judges will react to various arguments and evidence. While most divorce cases settle, the most contentious ones end up in a courtroom and, in that circumstance, you want a seasoned professional on your side.
  • Familiarity with opposing counsel – Most family law attorneys in your area will interact in court and develop working relationships. Experienced family law attorneys can draw upon those contacts to work effectively with your spouse’s attorney to help negotiate a settlement that is fair and equitable.
  • Alternatives to litigation – Family law attorneys can advise their clients on whether alternatives such as divorce mediation may be appropriate for their circumstances. Mediation can save divorcing spouses with good communication the time, expense, and stress of a divorce proceeding. In mediation, a facilitator helps guide divorcing spouses to an amicable agreement. While this option isn’t for everyone, many couples have used it to successfully end marriages without the acrimony involved in divorce.

What a Family Lawyer Can Do

A family law attorney will be able to properly fill out all of the required paperwork and forms needed when going to court for family law problems, the lawyer will accompany their clients to court to represent them, and a family law attorney will also make sure that their clients receive the proper amount of compensation for their pain and suffering. No matter what type of case, it is difficult to represent oneself in a court of law but it is especially difficult to represent oneself in a case that involves family law and another spouse or another member of the family.

Anyone that needs to hire a family law attorney should consult with a couple of different attorneys first before deciding to choose a specific one. The consultation meeting should include the asking of questions about the lawyer’s experience and background, their success rate in family law cases, their education background and whether or not the attorney has represented clients in this specific area of family law in the past.

Posted inLegal

Homeowner Tips From A Certified Electrical Home Inspection Pro

Home Inspections

WHATS SO SPECIAL ABOUT MY ELECTRICAL PANEL ??

We never think about it. Yet it serves us every day.  It is the largest safety device in your home but most do not appreciate what is does. It is your electrical service panel. It is the heart of the home electrical system and is in essence the heart of our modern lifestyle.  Every year that goes by we require it to do more and more.

If you went to your main service panel and shut off the main breaker what would your life be in your home? No lights, no heat, no cooking, no TV so on… and so on. As a home inspector I had a curious thought. Why is it when I recommend a panel be replaced it becomes more of an issue than other components of the home?

As home inspectors we often cite that a roof need replacement or if an air conditioner or heat pump is old it is ready for replacement or your water   heater needs replacement. Most people understand and are used to the thought that these types of components reach the end of a useful lifespan and should be replaced.

This brings me to my main point. Service panels and their associated components were built for the time they were installed.  As such they were not designed in many ways for our modern lifestyles and demands. Americans use more electrical power per person than do people of any other country in the world, but that does not mean that we have a better understanding of electricity.

A study conducted by the U.S. Consumer Product Safety Commission (CPSC) in the 1980s indicated that the frequency of fires in residential electrical systems was  disproportionately high in homes more than 40 years old. The thought is that the aging of older electrical systems, combined with the fact that older homes were not built to the more rigid building codes of recent times

THINGS BUYERS SHOULD ASK ABOUT HOME INSPECTIONS

So you think you have found the home of your dreams. Open floor plan, big rooms, back yard, basement. Everything you have ever wanted. But what about the things you DON’T want? Electrical issues, heating and cooling? Or what about pest infestation? On the eve of the biggest purchase of your life there are many questions that loom large. Here are the top five questions regarding home inspections, that you, the buyer may have, or may have not even known you need to ask!

Are inspections “automatically” part of every home purchase?

No. As a buyer, you must include a home inspection clause in your purchase agreement, which will let you back out of the contract if the inspector discovers unexpected problems with the house. If you still want the house, an inspection clause allows you to renegotiate with the seller in light of any issues discovered—either requesting a price adjustment, or asking the seller to make necessary repairs prior to completing the sale.

What IS a home inspection?

A home inspection is a comprehensive review of the systems, structure and general “health” of a home, conducted by a qualified, objective inspector. If there are any issues that may degrade the value of the home, or require immediate/near-term repairs, they should be revealed by a professional home inspector. What is included will depend on the individual inspector, the local municipal codes, and the type of inspection(s) you request.

Basic home inspections should include visual inspections of the:

Roof

Foundation/framing (including wood rot)

Fireplaces

Plumbing systems

Electrical systems

HVAC (heating and cooling) systems

Interiors (doors, paint, floorings, ceilings, walls, windows, etc.)

Exteriors (siding, windows, doors, etc.)

Insulation/ventilation

Additional inspections may be done for:

The presence of radon, mold, or pests

At Inspection Tech we have a team of general home inspectors as well as a certified radon and mold specialist and a licensed structural engineer

How do I select an inspector?

You can ask your buyer’s agent to recommend a good, qualified, local inspector. You can also find one on your own. Either way, you should consider the inspector’s qualifications, confirm if they are bonded and insured, and if they meet the requirements to be licensed in your state. You may also want to ask how long they have been in the business and request references from past clients. There are a number of state/national/international professional home inspector organizations; ask your potential inspector if they are a member of any of these groups.

home inspection standard is good for home inspectors

will explain why and debunk some of the myths around the final Standard, which is dramatically different than the draft that was broadly circulated in 2014.

WHY THE STANDARD IS IMPORTANT:

It adds credibility to the home inspection profession.

a. The CSA is a recognized and trusted name to consumers.

A nationally recognized standard provides consistency coast to coast.

The Standard does not require home inspectors to re-invent themselves.

a. The Standard requires a minor shift in inspection procedures for most home inspectors.

The initial draft of the Standard is very different than the final version.

a. The draft drew significant criticism from the home inspection profession.

b. The Technical Committee listened and made extensive revisions.

The Standard is very similar to existing Standards of Practice.

a. The similarity acknowledges that the home inspection profession is built on a strong foundation.

The Standard was created using a professional, defendable process.

a. The Standard was created using the well-established CSA protocol, which has been in place for roughly 100 years.

b. The Standard was created with input from home inspectors, representatives from the real estate profession, the Electrical Safety Authority, Consumers Council, regulatory authorities, education bodies, insurers, the National Research Council, and First Nations National Building Officers Association.

The public can be comfortable that the Standard is fair and consumer focused.

COMMON MISCONCEPTIONS ABOUT THE STANDARD

Home inspectors have to pay for it.

a. Not true. Inspectors and their clients can access it

Home inspectors have to include a summary in their report.

a. Not true.

b. A summary is recommended, but not required.

The Standard is unfair to inspectors.

a. Not true. The draft Standard was very different from current home inspection practices.

b. The final Standard is closely aligned with what home inspectors have been doing for years.

Roughly 95% of the inspection is what most professional inspectors do now.

A home inspection is non-invasive.

It is an evaluation of the condition and performance of the systems and components of a home.

The objective is to identify and report any items that are not performing their intended function.

The focus is on significant items that are readily visible to the inspector, rather than minor building deficiencies.

Inspection of cosmetic, maintenance and other non-critical items are excluded.

The inspection does not address compliance to codes and regulations.

Inspectors can provide services beyond the Standard.

The Standard applies to detached and semi-detached homes, townhouses, duplexes, triplexes and individual dwellings in multi-unit buildings. It includes site-built and factory-built (prefabricated) dwellings.

Readily accessible items are inspected. Inspectors don’t move furniture, carpet, stored items, etc.

The exclusions are consistent with those in most existing standards. For example, inspections do not include appliances, water supply or sewage systems, methods or costs for repair, identifying causes of failures or predicting service life.

Inspections include representative sampling where there are multiple similar components.

Written reports describe significant issues including health and safety, and their implications.

The components to be inspected are the same as other standards, with the exception of those noted below

What Happens During a Plumbing Inspection?

resident bought a 3-story home last year and it was old enough that a friend expressed concerns about plumbing and wiring. “If there’s anything wrong, the inspector will catch it,” said the home buyer airily. Months later, the kitchen ceiling crashed to the floor from the weight of water damage.

Home Inspections Often Superficial

For the purposes of buying/selling real estate, home inspectors do only 3 things to inspect the plumbing: They check if water runs from the taps, drains empty, and toilets flush. “Home inspectors do not have the technical knowledge to advise potential homeowners if the plumbing in the house is up to code or even if sewer gas is leaking back into the home,” says one professional plumber.

Professional Plumbing Inspection

There are many reasons why you may want a professional plumbing inspection. In addition to buying or selling property, you may want an inspection to prevent costly emergency plumbing services.

Here are some things to expect from your home plumbing inspection:

Check water filtration systems

Examine fixtures, supply lines, drains

In-depth investigation of all above-ground, exposed plumbing, including shut-off valves and traps under kitchen, bathroom, and laundry room sinks;

Inspect sinks, showers/bath, toilets

Inspection of bathroom, kitchen, and laundry room draining and venting systems

Inspection of the storage water tank or tankless water heater

Plumbing video camera inspection of underground sanitary drains and sewer pipes. Cracks and misalignments that can lead to future drain blockage or collapse.

Shut-off valve inspection

Sump pump and discharge inspection

Early Detection Key to Whole-House Wellness

Physicians often claim early detection can save lives, so they promote preventive care. Your home’s plumbing can benefit from early detection too.

HOME INSPECTION FAQS

Home inspections are a vital part of the home buying and selling process but do you know what home inspectors actually do or if a house can even fail a home inspection? Luckily, we’ve put together some of the most frequently asked questions about home inspections and asked real home inspectors to answer them. Here is everything you need to know about your home inspection.

WHAT IS A HOME INSPECTION?

A standard home inspection is a non-invasive, visual examination of the physical structure and major interior systems of a residential building. Without a comprehensive home inspection, you could end up paying thousands of dollars in repairs or possibly buy a house that is unsafe.

ere’s an overview of each element of a home that must be inspected.

Foundation: the inspector will take a look at the foundation to examine it for cracking and shifting, and to ensure that water is draining away properly from the foundation and basement

Lot: the lot will be examined for proper grading and drainage and the quality of walkways and the driveway will also be assessed.

Roof: the roof will be examined for faulty shingles, damaged flashing, signs of water damage, and overall integrity

Exterior: the exterior siding, windows, doors will be examined to assess their overall wear and condition

Attic: the attic will be inspected to ensure that it is properly ventilated and insulated

Interior: the interior of the home will be examined, including wall outlets, lighting fixtures, walls, doors, and all other such surfaces and areas

Basement: the basement is inspected to ensure that it is free from leaks and water damage. Issues like mold and water leaks are also quite common in basements

Electrical: your home inspector will make sure that all electrical outlets, switches, and lighting fixtures work

Plumbing: the functionality of the plumbing systems will be checked, including water pressure, hot and cold water, as well as functionality of all sinks, bathtubs, showers, and other systems

Appliances: major appliances will be tested and verified for proper functionality

HVAC: the furnace will be examined for integrity, and problems like cracks or wear and tear. Air ducts and air conditioning systems will also be examined and tested

The purchase of a home is one the largest single investments you will ever make. With that in mind, it is extremely important that you learn as much as you can about the condition of the property and the possible need for any major repairs before making the purchase. A home inspection helps minimize the possibility of unpleasant surprises, unexpected costs and post-purchase headaches. Throughout your inspection, your inspector will even give you maintenance tips that will be necessary to keep it in good shape. After the home inspection, you will have a much better understanding of the property you are about to purchase, giving you confidence and peace of mind.